
Buttery Bars with Sweet Cherry Filling
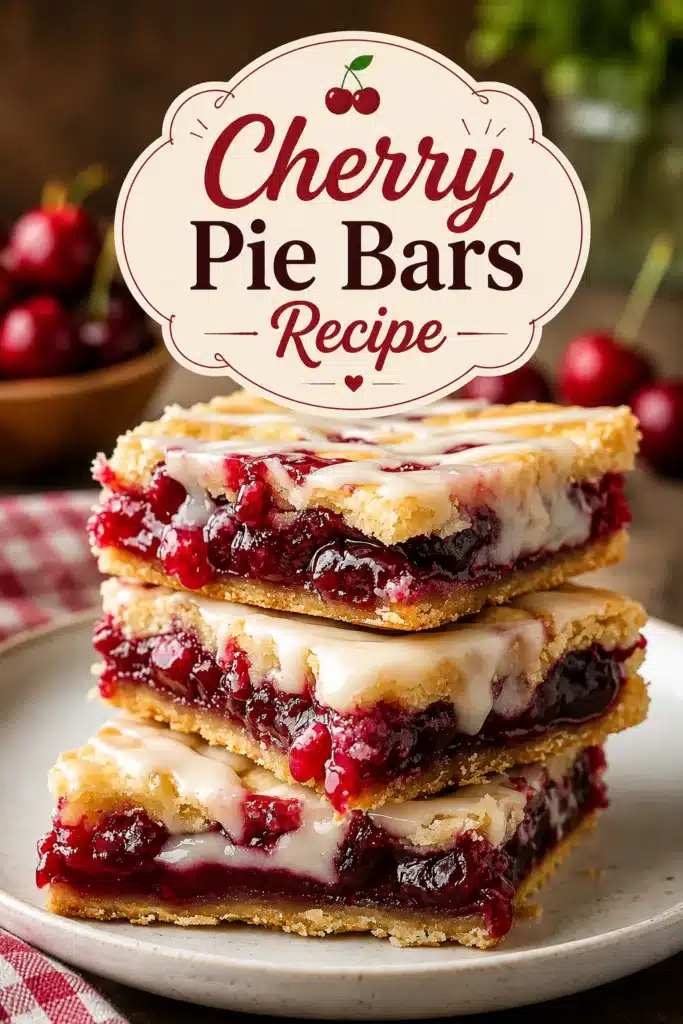
These Cherry Pie Bars are everything you love about classic cherry pie in an easy-to-make dessert bar. With a rich, buttery crust, luscious cherry filling, and a light vanilla glaze, they’re perfect for holidays, potlucks, family gatherings, or an everyday sweet treat. Best of all, there’s no need to fuss with rolling out pie crusts, making this recipe a great time-saver for busy bakers. Every bite delivers the perfect balance of tender cookie-like crust and juicy cherries, making these bars a Pinterest-worthy favorite you’ll want to bake again and again.
⏱️ Time Breakdown
- Prep Time: 20 minutes
- Cook Time: 40–45 minutes
- Total Time: About 1 hour 10 minutes
- Servings: 16 bars
📝 Ingredients
For the Crust & Topping
- 1 cup (226g) unsalted butter, softened
- 2 cups (400g) granulated sugar
- 4 large eggs
- 1 teaspoon vanilla extract
- ½ teaspoon almond extract (optional but highly recommended)
- 3 cups (375g) all-purpose flour
- 1 teaspoon salt
For the Filling
- 2 cans (21 ounces each) cherry pie filling
For the Glaze
- 1 cup powdered sugar
- 2 tablespoons milk
- ½ teaspoon vanilla extract
✨ Kitchen Tools You’ll Need
This recipe doesn’t require fancy gadgets, just a few reliable kitchen basics to keep everything simple and stress-free.
- 9×13-inch baking pan
- Mixing bowls
- Electric mixer or hand whisk
- Measuring cups and spoons
- Rubber spatula
- Offset spatula or spoon
- Cooling rack
- Small bowl for glaze
👩🍳 Step-by-Step Instructions
1. Prepare the Pan 🍒
Preheat your oven to 350°F (175°C). Grease or line a 9×13-inch baking pan with parchment paper for easy removal.
2. Make the Batter
In a large bowl, cream together the softened butter and sugar until light and fluffy, about 3–4 minutes.
Beat in the eggs one at a time, mixing well after each addition.
Stir in the vanilla and almond extract.
Gradually add the flour and salt, mixing just until combined. The batter will be thick.
3. Build the Bottom Layer
Spread about three-quarters of the batter evenly into the prepared pan.
4. Add the Cherry Filling 🍒
Spoon the cherry pie filling evenly over the batter, gently spreading it to the edges.
5. Add the Top Layer
Drop spoonfuls of the remaining batter over the cherries. Don’t worry about covering everything—the filling should peek through.
6. Bake
Bake for 40–45 minutes, or until the top is lightly golden and the center is fully set.
The edges should be golden brown and the kitchen will smell wonderfully buttery.
7. Cool Completely
Allow the bars to cool completely in the pan before glazing. This helps them slice neatly.
8. Make the Glaze ✨
Whisk together powdered sugar, milk, and vanilla until smooth and pourable.
Drizzle generously over the cooled bars.
Let the glaze set for about 15 minutes, then slice into squares and enjoy!
💡 Pro Tips
- Chill the bars for 30 minutes before slicing for extra-clean squares.
- Almond extract beautifully enhances the cherry flavor.
- Homemade cherry filling can be substituted if you have fresh cherries.
- Store covered at room temperature for 2 days or refrigerate for up to 5 days.
- Freeze individual bars for up to 3 months.
🌟 Variations
- Add white chocolate chips to the batter.
- Sprinkle sliced almonds over the top before baking.
- Swap cherry pie filling for blueberry, raspberry, or peach.
- Add a touch of lemon zest to the glaze for a brighter flavor.
- Dust with powdered sugar instead of glazing for a lighter finish.
❓FAQ
Can I use homemade cherry pie filling?
Absolutely! About 5–6 cups of homemade filling works perfectly.
Can I freeze Cherry Pie Bars?
Yes. Wrap individual bars tightly and freeze for up to 3 months. Thaw overnight in the refrigerator.
Do these need to be refrigerated?
They can stay at room temperature for 2 days, but refrigeration keeps them fresh longer.
Can I make these ahead of time?
Yes. They’re actually even better the next day once the flavors have settled.
Why is my batter so thick?
That’s completely normal. The thick batter creates the signature soft, buttery texture that holds the cherry filling perfectly.